Welcome the Summer Months with Exciting OPI Gel Nail Polish Combos

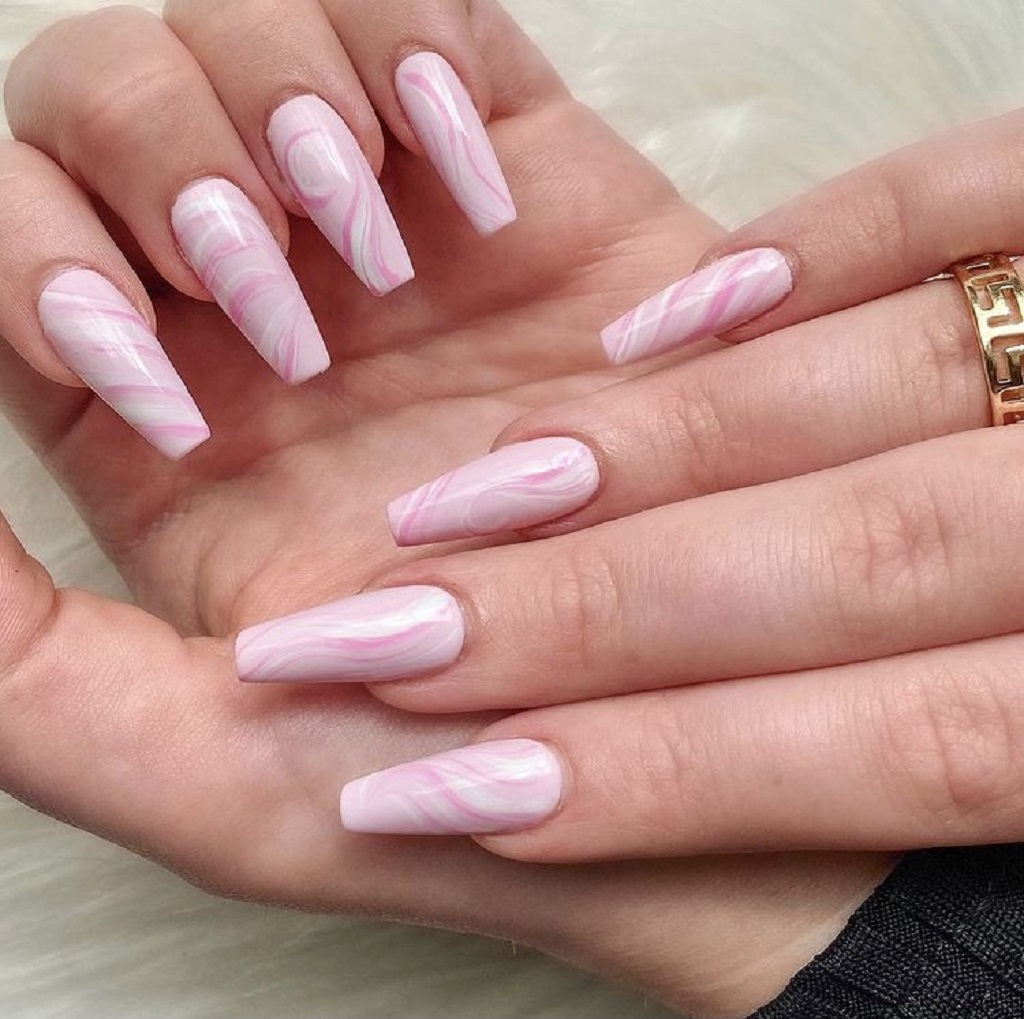
The summer months have arrived with a bang. So, your beach visits will increase, and so will the suntan. While you can avoid cosmetic makeup during the sticky summer months, your nails do not have any such restrictions. You can try out any design with gay abandon and have a whale of a time showcasing them on your social media handles. Here are some summer nail polish ideas that can set the sandy beaches on fire. Your OPI gel polish kit should be an ideal companion to have when you set out creating one innovative design after the other on your nails.

Top OPI Gel Nail Polish Colors for Summer

Nude colors are the blazing trend today

The best aspect of nude paints is that they suit almost every occasion. If you are preparing for an interview, the nude finish can be impressive. Similarly, the nude shades are the perfect ones to have when you frolic around with your friends and children on sun-kissed beaches. Choosing a color matching with the sands, water, or sky would be mesmerizing. You have a fantastic range of golden, blue, and green shades on display when you choose OPI gel nail polish to make your summer vacations memorable.

Continue reading “Welcome the Summer Months with Exciting OPI Gel Nail Polish Combos”

Learn How to Apply DND Glitter Polish at Home

As it is, nail polish looks beautiful and makes a woman more charming than she is. When you have a glitter coat over your regular nail polish manicure, it takes the beauty quotient to an entirely different level altogether.

DND glitter polish looks heavenly on your nails, but it can be quite a challenge to put it on. If you have used glitter polish, you will know that it is quite a struggle to master the art of applying glitter polish. It does look intimidating, as a perfect glitter application can take several hours to dry. Besides, an imperfectly done job could look patchy and uneven. The removal process takes a lot of time, and hence, many people avoid using it. Here is a simple trick that should make applying DND glitter polish on your nails as easy as eating a cake.

Have you ever wondered how nail technicians apply glitter polish masterfully? It is because they have learned this trick.

What is the secret to applying glitter polish?

If you think that applying glitter polish is similar to using any other DND gel polish, you are sadly mistaken. However, if you want it to look heavenly beautiful as it looks inside the bottle, this tip should prove handy.

The apparatus

Before you start with your glitter polish application, you should be ready with the following ingredients:

A regular basecoat – the ones that you apply for your regular gel manicures.

Continue reading “Learn How to Apply DND Glitter Polish at Home”

Best Tattoo Care Instructions: Products, Tips & More

Having a tattoo on the skin is a dream of everyone nowadays. Specially young girls and boys want to ink their body and show off in front of their friends to show their creativity and art and look cool as well. Here the thing worth mentioning is that it is not only about the pain of tattoo machines but also the care and maintenance is important. Without proper care and special handling, the tattoo can fade away and give a bad texture on the body. Instead of a bold beautiful design, you will look unpresentable. So here are some of the care instructions, products, tips and many more to take care of your tattoo.

Tips

Give time to heal

Give your skin time to absorb the tattoo ink and get healed from the effects of harsh drilling tattoo machines.

Use petroleum jelly

Petroleum jelly is known for its best moisturizing effects. It will moisturize the skin and help it to heal back in no time. Also it will shine up your body and give a natural glow.

Use Sunblock

Cover the tattoo with at least 30 SPF sunblocks whenever you get exposed to the sun.

Avoid harsh face washes

Avoid products that exfoliate the skin and cause irritation.

Use good products

Use good products for your skin. Dont compromise when it comes to skin care.

Talking about products, we brought to you some of the best tattoo aftercare products. I hope you will fall in love with them.

Tattoo Goo Aftercare Lotion

Tattoo Goo is one of the famous aftercare products and the brand has an extraordinary reputation in the cosmetic industry. This is no doubt the best tattoo aftercare lotion which hastens the healing process and allows your skin to restore the lost balance. It is a gently acting product with a creamy consistency. It gets absorbed in the newly inked tattoo and allows it to heal faster. It does not leave any greasy texture on the skin.

Continue reading “Best Tattoo Care Instructions: Products, Tips & More”

Top 6 Best Products to Reduce Acne Scars for 2020

Acne is a matter of great concern for the skin types of every age group. Usually, the acne lasts from 2 weeks to a month on your face and if at all it is healed, it leaves behind a dirty scar which remains on the skin forever and keeps making you conscious about your looks. Taking all this into consideration and in order to get rid of these scars, a number of products have been analysed and thoroughly tested to check the efficacy of ingredients. After a complete and refined research about the best products for the acne scars, we were able to find the right products for you. So without any further delay, let’s get to the review of these amazing products.

BOTANIC HEARTH Acnex Scar and Acne Wash

Botanic health Acnex scar wash is manufactured by the raw ingredients of peppermint and tea tree essential oil making it perfect for all types of skin. The special Geranium reduces hyperpigmentation. The plant oils eliminate the bacteria from the skin thus helping in achieving a smooth and clean skin.

The cleanser will help in removing the appearance of acne scars from the face. It is effective enough to get the results with few days of usage. At the same time, it is gentle enough to be used twice a day.

Neutrogena Oil-Free Acne Stress Control Triple-Action Toner

If nothing is working on your skin, try out the best toner for acne-prone skin and you will love the results it has produced. It has natural richness of cucumber and green tea which gently soothe and heal your skin and make it less irritated. Green tea has amazing healing properties. It slowly and gradually reduces the appearance of scars and makes your skin soft and smooth.

CeraVe Retinol Serum for Post-Acne Marks and Skin Texture

This product is formulated by the expert dermatologists. The cleanser will clean the skin from any impurities, moisturize it properly using the oils present in it and the essential ceramides in the skin helps in restoring the protective barrier of the skin. Thus it helps in reducing the acne scars through all the effective ways. The product is allergy tested and found to be paraben free, fragrance free, non comedogenic and allergy free. The refined retinol derived from vitamin A boosts the recovery process and offers a fine even skin texture.

Continue reading “Top 6 Best Products to Reduce Acne Scars for 2020”

Top 6 Best Drugstore Toners for Every Skin

Very few people know that many impurities still remain trapped in the pores of your skin, no matter how much good face wash you are using. So, if you want to take the facial cleansing process to a whole other level, facial toners are the best for you. These are the best options to keep the skin not only deeply cleansed, but also prevent aging and weakening of skin cells.

So we have brought to you the list of the best drugstore toners that are suitable for all skin types.

L’Oréal Paris Skincare HydraFresh Toner

This toner is a perfect addition to the Loreal series of amazing skin care products. This toner acts gently on the skin, refreshing the tired skin and softening it. Even after one wash, the skin looks bright, smooth and radiant. It greatly secures the moisture of skin and keeps it highly hydrated. The product is alcohol free and dermatologically proven to be safe for all skin types. Using it twice a day produces results within a week.

COSRX AHA/BHA Clarifying Treatment Toner

Looking for the best Korean toner for acne prone skin? Here is the best product for you. The COSRX toner comes in a mist dispenser that is easy to use. It soothes and heals any irritating skin abrasions. Softening the skin, it gives a refreshing feeling. Its natural ingredients keep the skin moisturized and healthy. All of the ingredients used in the moisturizer are vegan and skin friendly. The exfoliating agents maintain the natural texture of skin and restore moisture. It is suitable to be used for all skin types.

Organic Rosewater Witch Hazel

The all natural rosewater by witch hazel is perfect for all skin types due to its organic properties. It refines the skin after washing the face and gives a soothing effect. The formulation contains ingredients which are essential hydrating agents that provide all the necessary moisture to the skin. Rose water provides nourishment and keeps the skin fresh throughout the day. All the ingredients in this formulation are cruelty free and totally vegan.

Continue reading “Top 6 Best Drugstore Toners for Every Skin”

Nail Dip Powder Allergic Reactions

There are manicure lovers who do not value all the time and money it takes to get a manicure because it hurts them or lasts for a short time. However, dip powder systems came to save such people’s lives because instead of damaging the nails, it tends to strengthen and nourish them. It also lasts for over three weeks, which is longer than anyone would ever expect. For starters, the feeling is overwhelming, considering that the quantity of the sold dip powder content, the quality, and the time it lasts are worth its price. It would be intriguing to get hold of something that seems to be the solution to all your past problems. Most adverts state that a dip nail manicure is easy to apply and remove for both professionals and beginners.

Consequently, some people trust their artistic techniques and purchase their first dipping powder starter kit. The then directly head home for a DIY. However, it does not matter whether you got your mani in a salon or at home. It is necessary to understand that you might be one of the few people who may experience allergic reactions from nail dip powders.

Signs and Symptoms of Reaction

It is not only the upcoming dip nails that cause allergic reactions. Even the top-rated dip powders have similar effects. You can get an allergic reaction from Kiara sky, SNS, OPI, DND, and LDS nails or any other dip powder or dipping liquid in the market. Nonetheless, most of the dip powder allergic reactions are caused by liquids like the sealer or base. Different people experience different allergic reactions, but dip flu is the most common dip powder allergic reaction.

Continue reading “Nail Dip Powder Allergic Reactions”

Use These Tricks to Perk Up During Pregnancy

Are you feeling tired? Overwhelmed?

Day-to-day life does that, but being pregnant can make it harder.

Morning sickness, fatigue, surging hormones, acne, and so on make it hard to put on a happy face.

You want to be excited and to take good care of yourself for your baby’s sake.

That’s why I have some ideas for you to help yourself perk up.

Get comfortable

Lots of articles will tell you that you need to drink more water, eat healthier food, take your vitamins, etc.

You know these things, and you’re probably doing them already.

But have you thought about making yourself more comfortable?

Every pregnant woman I’ve known has back pain.

Plus, their feet swell.

The solution is straightforward.

You need the best shoes for pregnancy.

 Right now, you don’t need to be bending over to tie laces.

Continue reading “Use These Tricks to Perk Up During Pregnancy”

How to Achieve Perfect Holiday nails using Kiara Sky Dipping Powder

It is every woman’s dream to have a manicure that will last a full two weeks without being cracked or chipped. For the past, this dream was considered a miracle but when nail dip powder hits the scene, it was considered a godsend. Dip powder color is an easy DIY that lasts longer than nail polish and if you want to achieve this, then it is time to hit the sign up button!

Nail Dip Powder is stands in the line between a regular mani and a fake acrylic nail. But instead of using UV rays to seal in the DND polish, in this method, colors comes from pigmented powder. This trend is not that new as it has been around for years now but with the hype on social media, it is becoming more popular and more and more salons are now offering the service.

Continue reading “How to Achieve Perfect Holiday nails using Kiara Sky Dipping Powder”

Things to Consider When Buying a Sunscreen

For buying a sunscreen that actually helps in protecting your skin, it is necessary to know that you will be able to find the best match for your skin because not all of the sunscreen lotions and applications are good for every skin type and under all different kinds of surrounding conditions. Some of the sunscreens are good for oily skin whereas some may be a good choice for the dry and dull skin.

No matter which type of skin you have, it is important to consider the ingredients and the kind of protection the sunscreen may give on your skin.

Despite the fact that most people may avoid sunlight for most of the daytime, but some us have a regular routine of staying outside. Staying under the direct sunlight can be harmful to the skin because it causes cell damage. UV rays may affect the skin cells very badly and cause damages to the skin in many different ways. This may cause wrinkles, dark spots and uneven skin tone that may lead to further damages and problems later on.

In order to make sure that your skin stays away from possible issues while going under the sunlight, you should be able to know which things or which aspects are important to know when you are in need of buying sunscreen for your skin.

Continue reading “Things to Consider When Buying a Sunscreen”

Styling Tips

Tip #1: Wash n’ Go

The basis for any natural style is to start with clean hair that is well conditioned and prepped for your style. That is especially true for the Wash n’ Go style.

Tools Needed:

Rat Tail Comb
4-6 Butterfly hair clips (depending on thickness/length of your hair)

Products Needed:

Gentle Shampoo
Deep Conditioner & Co-Wash
Leave-In Conditioner
Curl Defining Gel

 HOW TO GET A WASH N’ GO WITH SUPER DEFINED CURLS –

  1. Shampoo and Condition hair. Make sure to thoroughly detangle hair by using a wide tooth comb or your fingers
  2. Section your hair into four to six parts using butterfly clips 
  3. Starting with 1 section, apply a generous amount of the Natural Style by FUBU Leave-In Conditioner. The creaminess of this conditioning blend will blanket your hair with added moisture as well as gently detangle the section of hair.

*Note: FOR LEVEL 3 HAIR YOU CAN USE YOUR FINGERS, RAKING THROUGH THE SECTION USING THE LEAVE-IN CONDITIONER TO DEFINE YOUR CURLS AND SKIP NEXT STEP AS THIS MEDIUM HOLD FROM THE LEAVE-IN WILL BE SUFFICIENT

For a stronger hold (Perfect for level 4) –  Add a quarter size dollop (more for larger section, less for smaller section) of Natural Style by FUBU Curl Defining Gel throughout the section of hair, stroking and raking with fingers. Your Curls will begin to really pop! 

Repeat these steps until all sections have been completed. 

Lastly, use the Miracle Must Have Treatment and Finisher to seal in all of the wonderful moisture you just applied. After spraying over your entire head of hair, use your hands to gently scrunch the oil blend into your curls!

Tip #2: Twist Out (mid to shoulder length)

One of the most popular styles among naturalistas is the Twist Out! Here is How to get YOUR perfect twist out.

Tools Needed:

Butterfly Clips
Rat-tail comb

Natural Style by FUBU Products:

Gentle Shampoo
Deep Conditioner & Co-Wash
Curl Elongator
Miracle Must Have Treatment & Finisher

– HOW TO DO A TWIST OUT –

Shampoo and Condition hair. Make sure to thoroughly detangle hair by using a wide tooth comb or your fingers

Section your hair by parting from ear to ear. Clip the front section out of the way. Part the back section into 2 parts running from one side of hair to the other (use your earlobe as a guide) to form a “smile” part. Clip the middle section out of the way.

Apply a generous amount of the Natural Style by FUBU Leave-In Conditioner. The creaminess of this conditioning blend will blanket your hair with added moisture as well as gently detangle the section of hair. Make sure you are thoroughly coating each strand.

Add a quarter size dollop (more for larger section, less for smaller section) of Natural Style by FUBU Curl Elongator throughout the section of hair, Make sure to gently blend the product throughout the section.i

Generously spray the section with the Natural Style by FUBU Miracle Must Have Treatment & Finisher. This unique blend will not only seal in moisture but will provide additional moisture and beautiful shine.

Using your fingers (or rattail comb), separate a small section of hair and divide into 2 parts. Next, beginning close to the root, start to twist each of these sub-sections over each other all the way down until you reach the end of the twist. Note: If your ends need special attention, by all means add a bit more leave-in conditioner to the ends.

Repeat this process by sectioning another part equal to the first, and twist the same way.

Move on to the next section (s) until process is complete over entire head.

NOTE: DIRECT THE TWISTS IN THE FRONT SECTION IN THE DIRECTION YOU INTEND TO WEAR YOUR HAIR; IF YOU PREFER A BIT OF HAIR HANGING TOWARDS YOUR FOREHEAD, TWIST IN THAT DIRECTION.

After your hair has completely dried (air dry or with a hood dryer) it’s time to Twist Out!

Spray a bit of the Miracle Must Have on your fingertips and starting at the ends of the twists gently begin to unravel them. Once you have un-twisted the entire head you can use your fingers or a wide comb or pik to style your twist out to fit you perfectly!

Tip #3: Transitioning

While transitioning, your hair is at its weakest at the intersection of the natural hair and the relaxed ends. No fear!
There is hope for a smooth and healthy transition with Natural Style by FUBU products. Not to mention style that fits you perfectly!

Tools Needed:

Butterfly clips
Hair Pins

Natural Style by FUBU Products Needed:

Leave-In Conditioner
Miracle Must Have Treatment & Finisher
Curl Elongator

– HOW TO DO A TUCK N’ ROLL STYLE –

Start with clean, conditioned and detangled hair.

Beginning in the front, part your hair half way (to the top of your head) in the direction you want your style to be: center, left part, right part. You should have two sections (equal if parted in the center). Clip the section you are not starting with out of the way with butterfly clips.

Apply a generous amount of Natural Style by FUBU Leave-In Conditioner. Be sure to smooth and rub the product into the hair for optimal moisture. Do additional finger detangling as you rub the product in.

Smooth hair from the center of the head (if parted in the center) or from the top of the head (if parted on either side). Beginning in the front, small sections at a time, begin to gather the hair as you tuck and roll it flat against your head. Be sure to gently tuck those ends and continue to smooth the hair from the top center so you won’t end up with a puff at the top!

After you have tucked and rolled to the back center (you should be at the nape of your head) use a pin to secure the roll in place. You can also pin in sections along the roll as you see fit.

Repeat the process on the other side.

Tip # 4: The Up-Do

Many naturalistas wear an elegant updo when it’s time for them to style for a fancy occasion.
This easy style tip will certainly turn heads as you enter the room!

Tools Needed:

Wide Tooth Comb
Brush
Elastic Band(s)

Products Needed:

Gentle Shampoo
Deep Conditioner & Co-Wash (if co-washing)
Leave-In Conditioner
Curl Elongator
Miracle Must Have Treatment & Finisher

– HOW TO DO THE UP-DO –

After hair is clean and conditioned apply a generous amount of Natural Style by FUBU Leave-in conditioner. Completely detangle the hair, parting into smaller sections if needed.

While hair is still damp, gently brush the hair into a high position on top of your head gathering all sides until you have a smooth puff high on the top!

Secure with an elastic band.

Section the “puff” into smaller sub sections and twist them. The number of twists you have depends on the size/length of the puff.

Wrap the hair that is smoothed on the head with a silky scarf. This will ensure that the smooth part of the style will stay put all night. Let hair dry.

After hair is dry, remove scarf and un-twist each section at the top of your head. Use your fingers of spike the hair or perfect your look to suit you.

Spray with a generous amount of Miracle Must Have Treatment & Finisher and voila!

Tip # 5: Accessorizing your TWA (Teeny Weeny Afro)

If you’ve done the Big Chop, you know that style options can be limited while you wait for your locks to gain length.
That’s no reason to be limited on expressing your natural style!

Tools Needed:

The sky is the limit! Use accessories such as: Barrets, headbands, scarfs, feathers, clips, jewels etc.

– HOW TO ACCESSORIZE YOUR TWA –

As always, begin with clean and well conditioned hair

To make your curls/coils POP, add a generous amount of the Curl Defining Gel

Attach the hair accessory of your choice and work your TWA! Remember, you are not limited to a “hair” accessory. Use whatever shows off your unique style!